Cheeseburger in Paradise
When working through the cheeseburger tutorial I learned a whole lot of new of techniques for realistic illustration including how to use the mesh tool to shade shapes which would be the buns here, Also on how to use symbols to repeat small parts of a design like the seeds, And finally, How to use opacity to add texture to an illustration which in this case it would be the patty. I decided to do this design for the menu because in my opinion it looked clean, The fonts I used here were Barricada Pro, Bernard MT Condensed, And Alex Brush Regular. I used these font because it gave the menu a Modern look, Other Menu items that I created was the French fries by using four different colors, Shapes, And text for the logo at the front and that's how I created the French fries.
Design Matrix Challenge
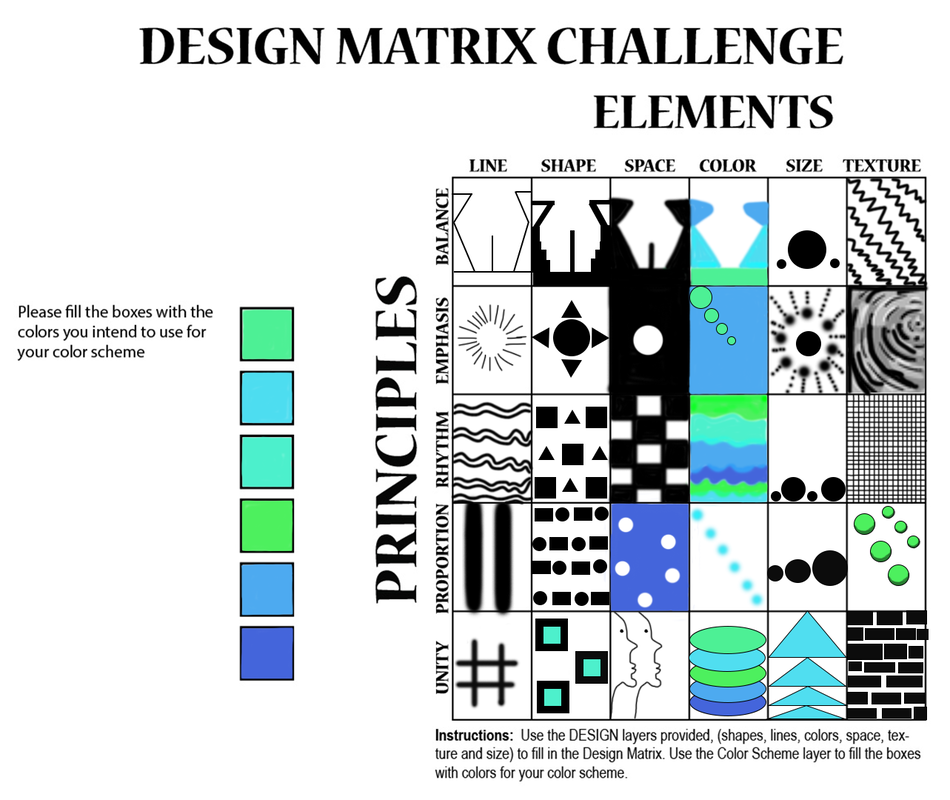
I demonstrated each principal of design in the columns provided, Starting with balance, I created a balanced picture using different elements to create the balance and placed them according to which element, With emphasis I tried to make an central point and draw the viewers eyes to the center of the rectangles, For rhythm I tried to show movement while keeping the image organized, Proportion I used two objects and and two lines and tried to show their relation to each other, And lastly unity involved blending all the principals together.
Rough Character Sketch Project
In this project, we had to draw a character. I chose to draw a businessman tiger, and I did a tiger because the mascot of CHHS is a tiger, so that's why I used a tiger for this project. His characteristics are: he likes money, he likes to do business, he's a goofy tiger, but when it comes to business, he becomes serious. Some backstory about him is that when he was a kid, he always liked money and used to sell snacks at school, and he would even make discounts to some people to gain more buyers. That's what he calls "business," and now his dreams have come true, and he is now a businessman and a very happy tiger. He lives with his family in a very big house. He loves his cars, especially his Rolls-Royce Cullinan. The way that I would make this character come to life in an animation would be on how much he struggles as a cub not knowing what was he going to do with his life when he grew up he obviously did not care when he was in elementary because he was still a cub but when he was in 8th grade he started to worry because he was about to enter high school and he still did not know what he was going to do with his life, but the only thing that he wanted was a job that payed out a lot of money and for the job to be fun, so he fist chose to be a cop and did his investigation and discovered that cops go though dangerous things so he got scared and back out then he thought of being a business tiger because he would always make deals and/or convince their parents with thing so he realized that he was good at that, so he went to the store and bought snacks and sold them at school at fist he didn't have a lot of customers so he went back to the store and bought better snacks and made some deal, after he was selling a lot but then he realized that he had some competition but he was still doing good, and since that day he wanted to be a business man and later on his life that what he became, and now he is living his life happy with family and friends, and that how I would make this character into an animation.
Masking project
What we did in this assignment was to use an object from a original photo and mask the object that we chose and use another picture and put the object there, The tool that we used was layer masking and what that does it allows the user to hide or erase parts of a layer non-destructively so that parts can be restored if needed.
Vignette project
what I did in this project was to get two pictures and fading out one of the pictures over the other picture, I used the lasso tool to crop the image then I made the feather 40 and what feather does is to make the edges of the image fade.
PBM - Lit & Cameras 4 CornersWhat I did on this scene was to create a free camera to follow the car, Some tools I used were link tool, move tool, rotate tool and more, the easiest part of this scene was to make the camera follow the car, And there was no hard part in this part of the project, something that could make this project better would be if we could ad more cameras with different angles, What I liked about this project was on how easy, cool, and fun this project turned out.
|
|
PBM - Lit & Cameras 4 Corners |
|
|
|
What I did to create this scene was to add a camera and align it to the cars roof, The hardest part of this project was to align the camera to the roof of the car because the camera would be pointing everywhere but I eventually got it, The easiest part of this project was on rendering the scene and adding the camera, what I also did in this scene was to shorten the animation time from 720 frames to 480 frames.
|
|
What I did to create the lighting was to first go to the create tab, then I went over to lights and selected a Free spot light and adjusted the multiplier to 0.75 and the hotspot to 20 and the fall off to 70 , After I adjusted the decay type to "inverse" then I also adjusted the decay start to 5 and lastly I aligned it to the cars headlights, I also linked the lights to the car so that the lights move with the car. I also added and adjusted the Flowing lights, Target sport (used for the sunrays), Omni (used for the moonlight), and lastly the skylight (used for the daylight), after all that I adjusted when the lights move and when they turn on at the timeline by clicking the auto key mode. And that's how I created this animation, The hardest part of this project was aliening the spot light to the car headlights, The easiest part of this project was creating and animating the daylight.
|
PBM - Lit & Cameras 4 Corners |
PBM - Animated 4 Corners
|
|
To make the car and the road I merged two different files one that I created and the other one that I didn't create witch was the car and the road, I merged it by Downloading the file and on my previously completed file I clicked the file button at the very top after I went over to the import button and waited for the submenu to rollout, Then I selected Merge and opened the other file and that was it.
|
PBM - 4 Corners Scene
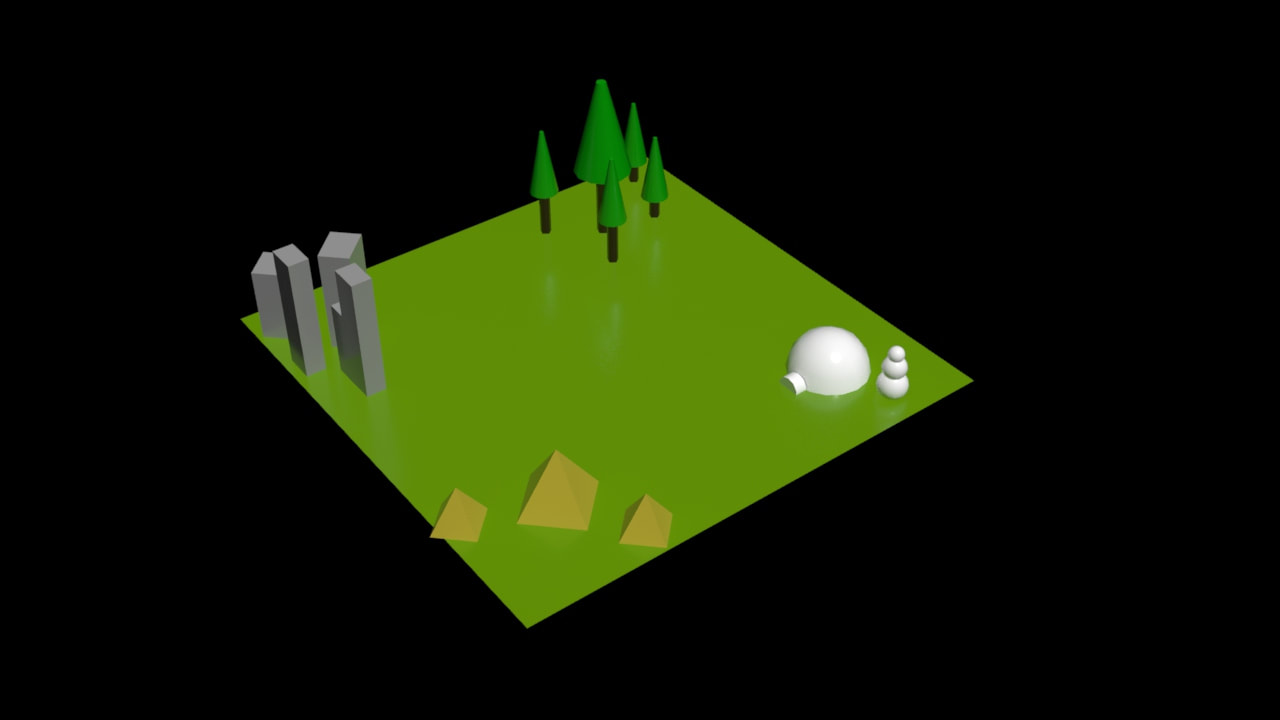
The first step that I did to create this scene is to first make a plane, witch would act as the grass as you see above, after I made five different boxes witch act as buildings, I rotated two of the boxes to make it look a more like buildings/city, After that I made five cylinders for the tree trunks, Then I made five cones for the upper part of the trees, Then the next step was to make another cylinder for the igloo entrance, Then I made A sphere for the igloo, After I did three Geo spheres for the snowman on the right, And lastly I did three pyramids, Then to finish it off I linked all the shapes into the plane. Some things that I used to create these shapes I used parameters, Length, Width, Height, Radius, length segments, Height segments, what I used to place the objects where they belong were X,Y,Z, I used the rotate tool to rotate the objects like the pyramids and other objects too.
